How to Plan and Build a Deck
Ground level decks are more suited to DIY than patios but your skills need to extend quite a bit further than putting up shelves. If any part of the deck is more than 60 cm above ground level, then you need to at least consult a builder if not call in the professionals to do it all.
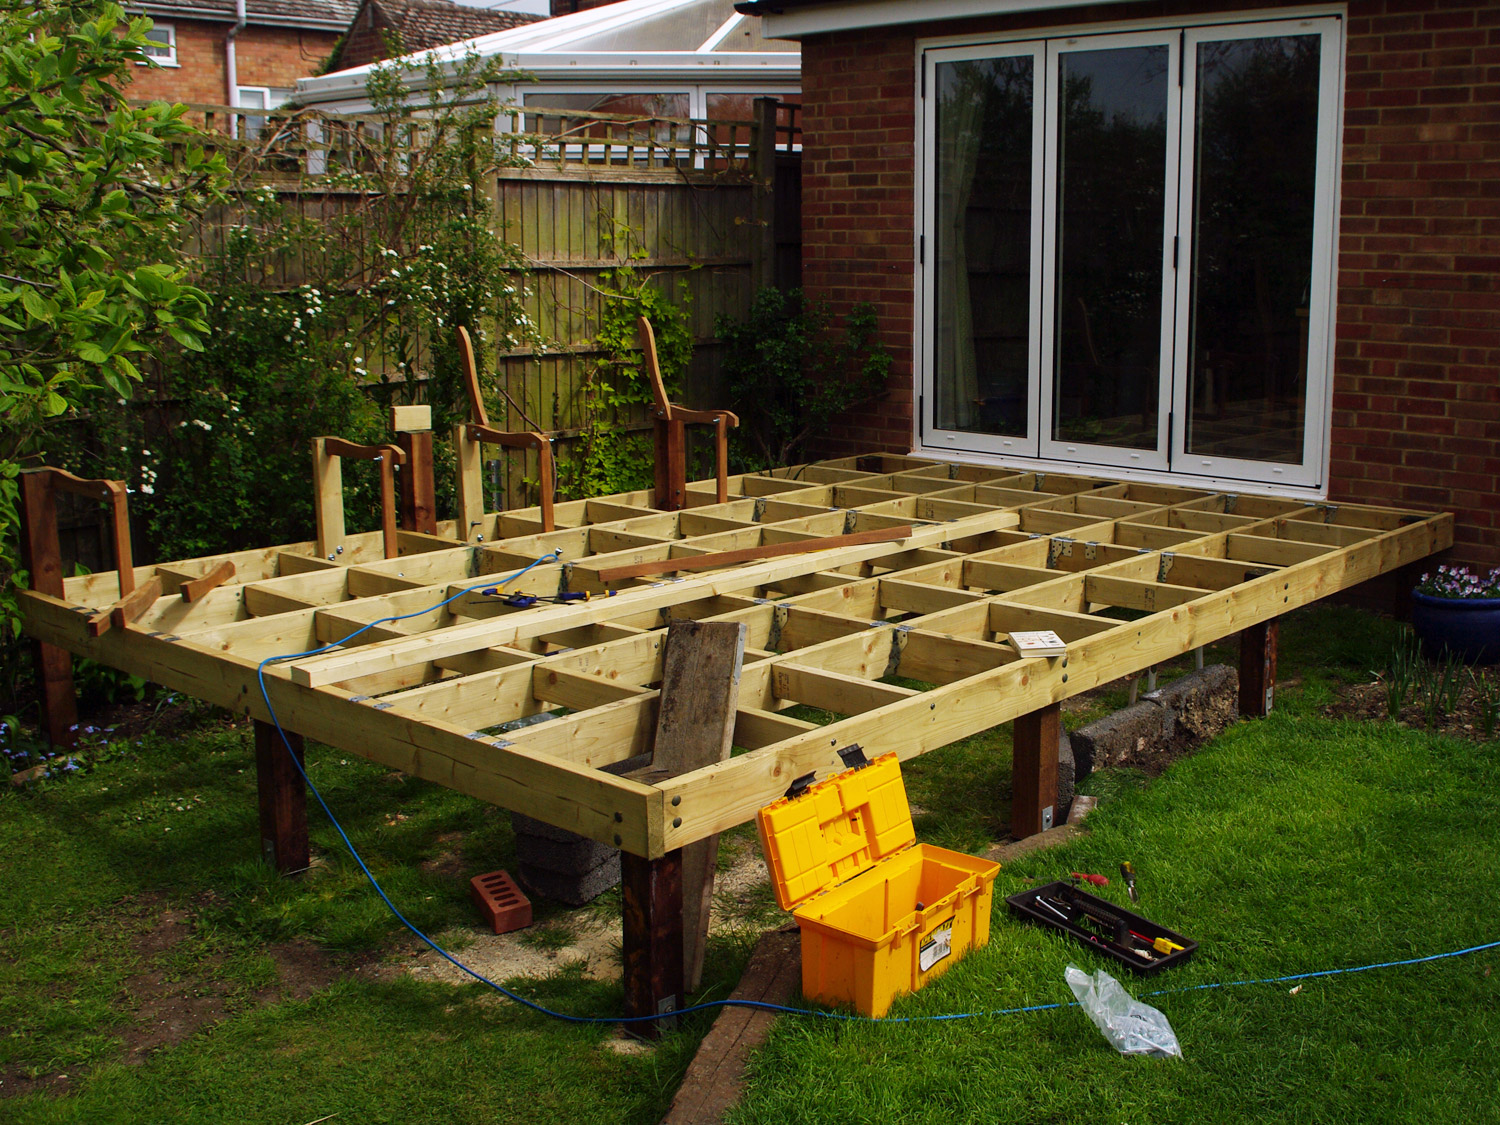
A deck consists of a substantial sub-frame topped with hardwood or softwood decking boards. Unlike patios, even "ground-level" decks are raised at least 6 inches due to the sub-frame. The sub-frame is built to the same standards as in the upstairs floor of your house. It should be very solid to the point that you don't realize at all that you are walking on a structure above the ground.
Specifications
- Ground support uprights of 100mm x 100mm (4" x 4") at maximum of 1.5m ( 5ft) centers.
- Framework of 150mm x 50mm (6" x 2") treated timber at 500mm (19") centers.
- This gives a maximum space of 1500mm x 500mm edged by 150mm x 50mm (6" x 2").
- Internal noggins 100mm x 50mm (4" x 2") giving a maximum gap size of 500mm x 500mm (19" x 19") .
- All cut ends of decking boards and any cut timber should be treated with exterior end grain timber preservative.
- The area under the deck should be stripped of turf and weeds and have a landscaping membrane laid with gravel over the top to keep it in place and prevent weed growth.
- All fixings and metalwork should be galvanized or otherwise treated for outdoors use.
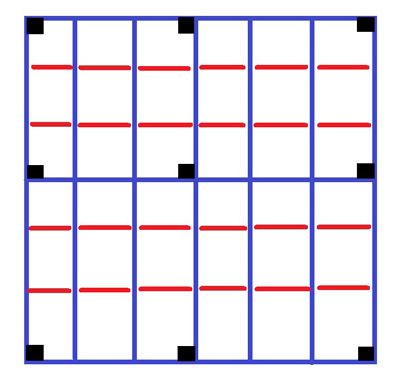
Plan of a 3.1m x 3.1m (10ft x 10ft) deck.
6" x 2" (150mm x 50mm) timber main frame at maximum of 500mm (19") centers.
4" x 2" (100mm x 50mm) infill timber frame.
4" x 4" (100mm x 100mm) uprights
Maximum unsupported area 500mm x 500mm (19" x 19"). The gaps are shown for clarity - there shouldn't really be any gaps!
The pattern can be used for other sizes and shapes, These sizes are the limits of what should be used, if the deck is 4m x 4m for instance, an extra set of ground supports should be used, rather than "stretching it", likewise extra infill should be used rather than make the unsupported gaps even larger.
Aim to "over-engineer" rather than get-away-with-it.
 Treated
timber
Treated
timber
Be sure to order timber that has been treated with a long-lasting preservative and is suitable for outdoors use, this is easier to obtain than it used to be, a preservative compound is forced deep into the timber under pressure. This results in a finished product that is impregnated with a long lasting preservative far better than you could ever manage just painting it on. It should be used for all outdoor woodwork as it will last far longer than untreated timber or any timber that you treat yourself. It also means that you don't need to worry about timber that is out of sight and can't be re-treated. This process results in timber that looks very much like it does in the raw state. It is not strongly coloured appearing only slightly darker than normal and with a green tinge. It can easily be stained with exterior wood stain that takes almost exactly its intended colour.
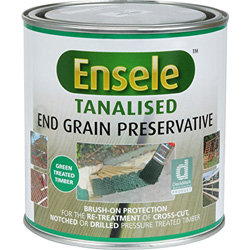
You will need to buy a tin of end grain preservative to paint on all cut ends (and there will be a lot!) as you go along. Don't try to do this at the end as many ends will be hidden or impossible to reach, it dries quickly.
Laying out
- Mark out the outline of the deck to begin with using builders line and pegs.
- Right angles can be fixed using a "framing square" - a large set square about 16" x 24". Alternatively three pieces of wood nailed together with the edges in the ratio 3:4:5 will give a right angle - measure carefully and make it large, a 1mm error over 1m is less important than over 10cm.
- Dig foundations first for the supports and place the supports very carefully and accurately, line them up "dry" using string, take your time as the accuracy of the whole structure for years will be dependent on those foundations.
- Don't rely on the timber you are using to be as straight as it should be. Exterior grade timber and decking boards can be somewhat warped, especially over the lengths used in deck building.
Foundations
Deck foundations should be laid on either large 4" x 4" (100mm x 100mm) posts bolted to metal post holders that are concreted in the ground, or onto breeze blocks laid flat and bedded onto a dug-in concrete foundation. The first gives the minimum extra elevation i.e. deck at about 6" (15cm) above ground level, the second gives extra elevation of the breeze block too unless these too are dug into the ground (with concrete beneath them).
Go deeper than 1ft (30cm) for post foundations if the deck is to be elevated up to 2ft (the same in the ground as out of it). If the elevation is over 2ft then consult the professionals. If you don't feel you need to, then you are already beyond the scope of advice on these web pages (or you should be).
It is possible to secure the edge of the deck to the house using a "wall plate", I prefer not to do this if possible so as not to start drilling into the brick work. It is perfectly possible to install a deck right up to the house suspended on free standing fixings.
Fixings
Use large and substantial fixings.
- On the main frame use 2 x 10mm coach bolts to fix the large main timbers to the uprights.
- Suspend internal frame members using joist hangers. These can be nailed in place or better still use screws power-driven to save time and effort and give greater accuracy.
- Smaller internal frame members can be held in place with 6" nails, make sure you buy galvanized nails, and take care when hammering in place so they are not bent over - use a large hammer! Pre-drilling a hole about 2/3rds of the nail diameter for about half the length of the nail will help. Nails have a greater shear strength than screws, so for any fixing that is is going to take a sideways force, a nail will be better than the equivalent sized screw.
- Decking boards can be held in place with decking clips, decking screws or nails. Decking screws leave the most visible head, but are probably the most secure fixing, they can be obtained in large buckets which are good value. Fix decking boards whenever they cross a frame member.
Finishing
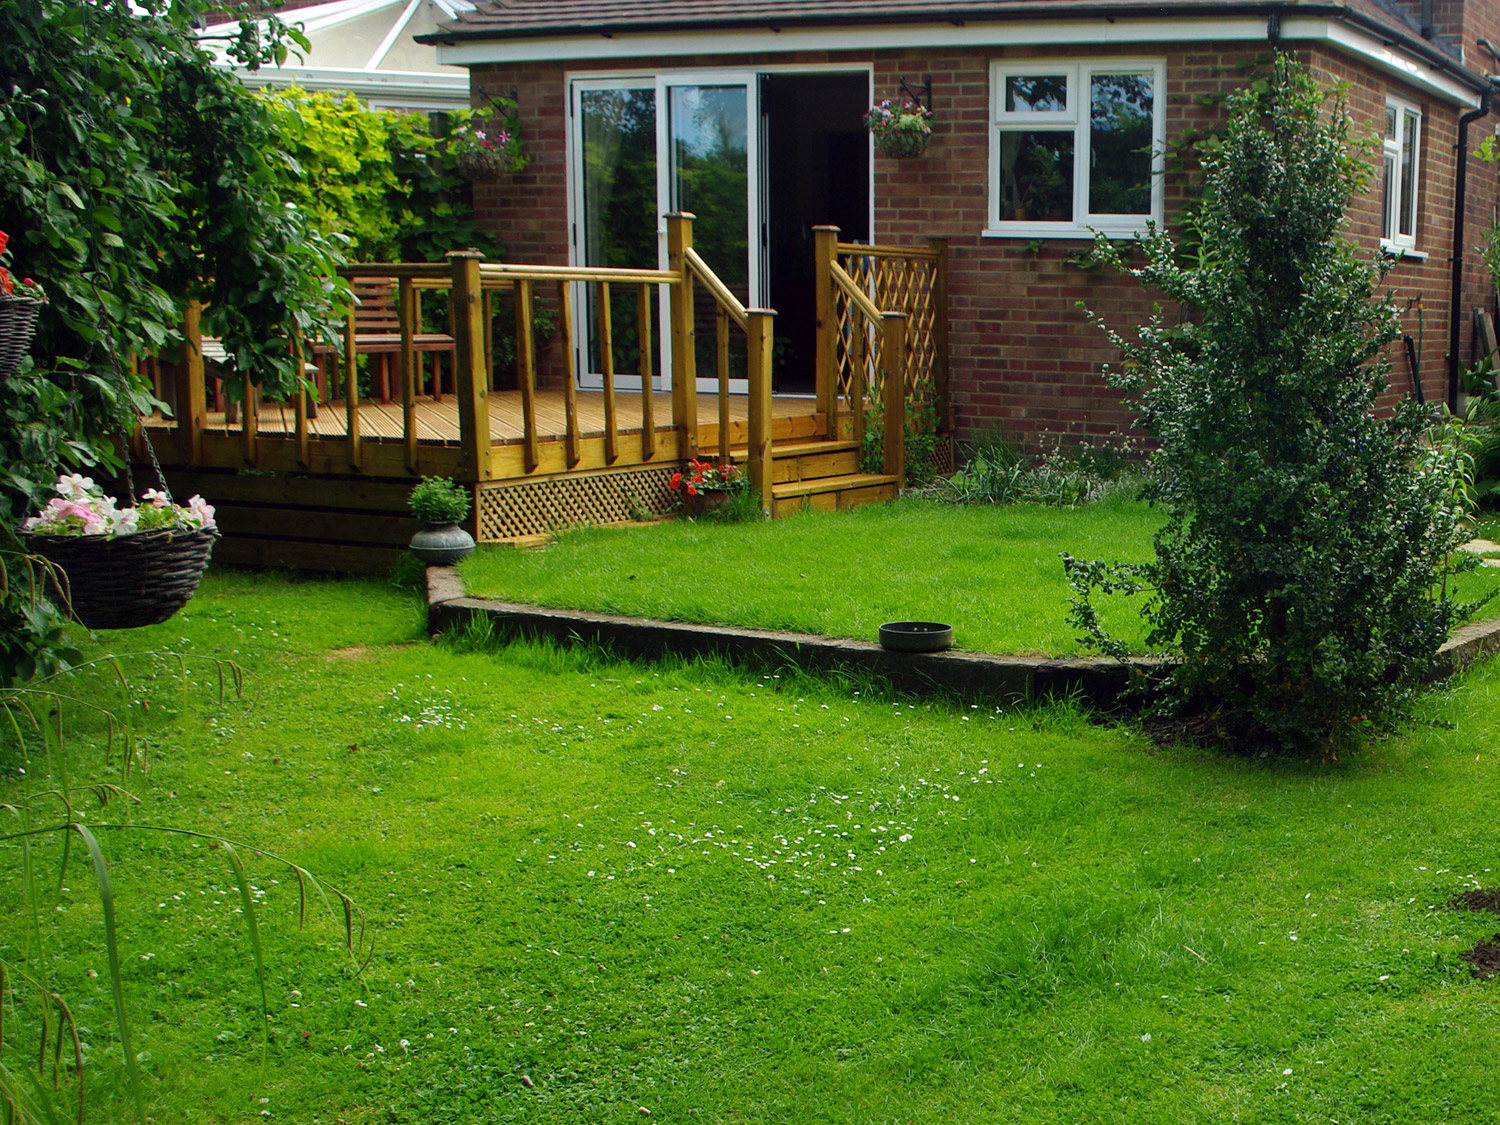
Your decking boards are what will be seen, so when you come to placing them take a little extra time to get things right.
- Only join cut decking boards above a frame member so that the ends of both boards are suspended.
- Use a fine-toothed saw to cut the ends of decking boards and avoid splitting of the wood.
- Seal all cut ends of decking boards with timber preservative.
- Use pieces of 5mm thick wood as spacers when fixing decking boards against each other, fix the ends first and then the middles - not all decking boards are as straight as they should be and this will "iron-out" the discrepancies.
- The edges of your deck will have visible rough cut 6" x 2" (150mm x 50mm) timber, face this with decking boards for a better finish.
- If your deck is not laid at perfect right angles due to surrounding areas then lay the decking boards at 45° this covers up a multitude of sins.
Tools and equipment - There's lots of opportunity to gain some impressive tools here if you don't have them already, suitably powerful power tools will make the job much easier too.
Measuring tools:
Measuring tape - min 5m
Builder's
Line - pins and nylon line
Framing
square - big set square for larger measurements
Combination Square
Spirit level
- at least 600mm, the longer the better, plus another shorter
one
Power Tools:
Circular Saw (a must, there's a lot of
large pieces of timber to get through)
Cordless
Drill
Cordless Driver (an impact
driver is ideal, small and powerful)
Corded Drill (with enough grunt for those long
large holes in timber)
Miter Saw (sliding ones get through wider timber)
Hand Tools:
Hammer
Hand Saw
Set square
Adjustable spanner
Socket spanner - and sockets
General Equipment:
SpadeWheelbarrow
Extension Cord
Softwood decking boards - These should be pressure treated with a preservative and ought to come with a 10 - 15 year guarantee. Do not use untreated timber, even if a preservative is painted on, it won't get deep enough into the wood.
Once built the deck can be stained almost any colour. Don't go too mad though, bright colours, jaunty music and speeded up action may make good television, but living with bright pinks and yellows long term is a different prospect. Any stain you paint on the deck should be regarded as cosmetic, it will certainly help preserve the wood, but it's no substitute for properly treated timber. You will also need to re-apply any cosmetic stains every so often as it will fade and wear off particularly in heavily trafficked areas.
Softwood will usually be cheaper than the hardwood alternative, though there is often surprisingly little difference in overall price due to the cost of the sub-frame and labour which are the same whatever boards are laid on top.
Hardwood decking boards - These do not need preserving in the way that softwoods do, though open end-grain should be sealed where cut. They are frequently darker in colour than softwood. Anyone even considering applying a coloured stain to a hardwood deck should be forced to have their whole house "made over" by over-enthusiastic publicity seeking interior designers on acid. (In my humble opinion). The finish of hardwood boards is very clean and high quality.
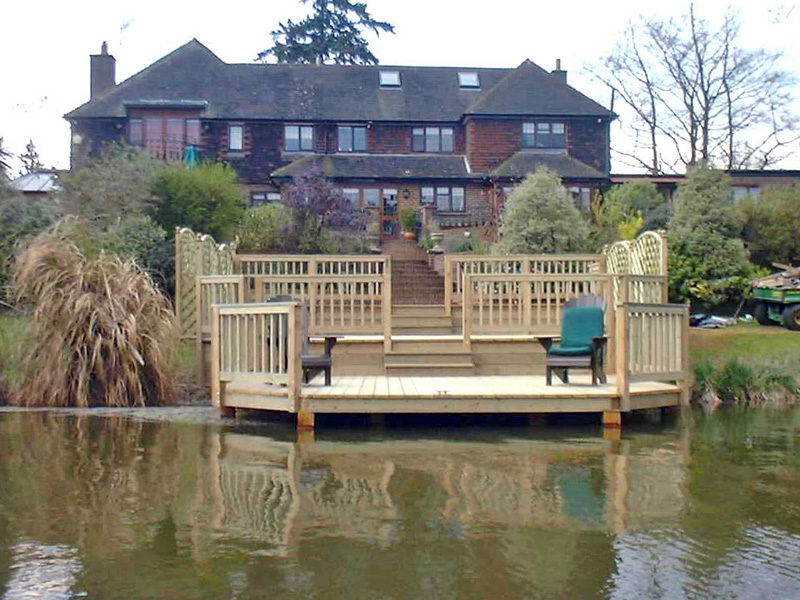
Decks can go where no patio ever could, and this is possibly their greatest asset. Here a deck has been installed to connect a house to the water. Over the water, piles must be sunk to provide a solid foundation. The sub-frame is built to similar standards as the floorboards in the upper stories of a house. This construction shows the true versatility of decks, it was constructed to act as a landing stage with good sized seating and entertaining areas.
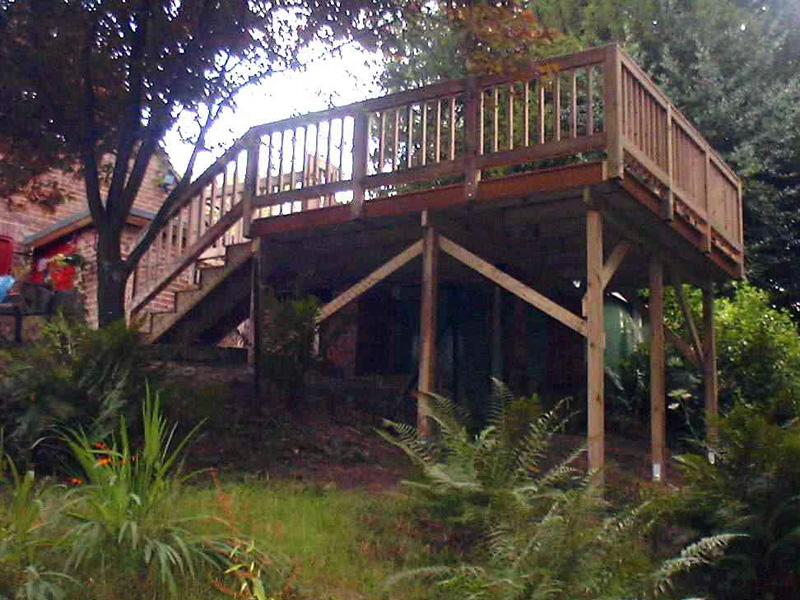
Decks can be used to make use of space where the ground is sloping and very uneven. As the deck is supported on above the ground rather than resting on it, then problems of leveling the ground and building a retaining wall simply don't arise. Decks can be relatively easy to construct on different levels as supporting posts are dug-in and cemented in place with the deck itself fastened to these above ground. There isn't too much digging to do and ground leveling is usually unnecessary. If you do this, make sure that each level of deck gives you a useful and useable area.
Q. Can I go over my patio with hardwood flooring and what would it take to do so?
A. If you mean hardwood flooring as sold for interiors, then no-way. Outside it would warp, curl and split. You could possibly use decking boards, but they would need to be fixed to battens. I'd use 2" x 4" wide-side on to the patio and fixed at intervals to the patio with frame fixings before attaching the decking boards. This would result in the deck being about 3" higher than the patio which would possibly be impractical and/or very strange looking.
Q. I'm investigating the prospect of using scaffold boards to deck my garden and wonder if it would be a feasible idea , I would greatly appreciate any feedback that you may be able to give me?
A. Yes you can use them. No I wouldn't use them. Un-textured slippery surface, untreated with preservative, too wide and they look like scaffold boards. Other opinions are available!
Q. We are having a large sweet horse chestnut tree removed from our garden and would like to use the trunk to create a small deck size 11ft x 11ft can we do this and how thick should each slice be. What preservative will we need to use. We want to sink the sliced trunk into earth and sand and fill the gaps with plants and slate chippings
A. I think you need to speak to whoever is cutting the tree into slices for you. Wood isn't usually used in this way until it's been seasoned for at least a couple of years, and then setting it into the ground would cause it to rot much more quickly. What you are proposing would probably need slices 2-3" thick to prevent warping (even then it won't completely) and wouldn't be that long lived due to rotting. I also can't imagine a table or chairs on it that aren't going to be very wobbly. You can't get a preservative to soak in properly until the wood has dried out and seasoned. An easier way to use the wood would be to slice it into discs 3 -4 " thick and use as informal stepping stones or similar. Large, flat untextured pieces of wood would also be likely to get very slippery when wet.
Copyright 2000 - present. All Rights Reserved | Privacy Policy Statement