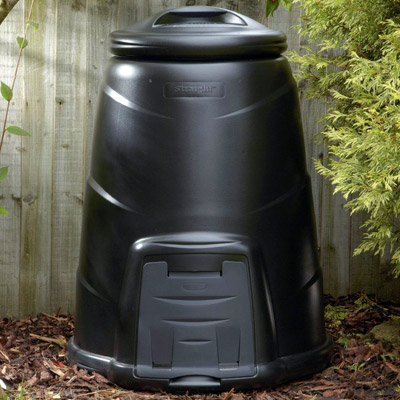
A basic black plastic compost bin is an easy way to start, it will reduce 3-4 times or more of its own volume of garden waste into compost in a year
Compost Maker Bins
Easily available and ready to go with minimal set-up, the ubiquitous "council dalek" can be made to work better by a few small simple actions.
Other composting pages: Making compost heaps | Composting | Q and A's
The best place to buy one of these is from here, put in your postcode and see the prices as agreed with your local authority, they will almost certainly be cheaper than any online retailer, local garden centre or DIY store.
I have three of these bins, one in my garden and two at the allotment. The garden one was free from my local council when they gave them away to encourage people to recycle at home. The two allotment ones were from someone in my village who gave them away via the local FaceBook page. So it could be even cheaper to look closer to home.
A single large bin of 200-300L is a good way to start making compost. If you are serious about making compost and your garden supplies enough fresh organic material, it will be more efficient to have two or preferably three compost bins/heaps. If you start to produce more than the single bin can cope with, the overflow can go into the relevant council refuse collection bin while you decide to increase your home capacity for compost making. I have three garden heaps but I still put anything very spiky or woody into the council refuse collection green bin as it would take too long (and therefore more capacity needed) for me to break it down at home.
Design and set up
![]() The better ones have the main part in a single piece.
Older designs such as mine came in two parts which clip together
cleanly when new but not when they get older which is why they
have all been repaired with 3 or 4 fixings made of a short strip
of builders band inside and out joined by 2 short bolts each,
expect another decade or more of use after the repair.
The better ones have the main part in a single piece.
Older designs such as mine came in two parts which clip together
cleanly when new but not when they get older which is why they
have all been repaired with 3 or 4 fixings made of a short strip
of builders band inside and out joined by 2 short bolts each,
expect another decade or more of use after the repair.
![]() The small door at the front is useless, it gives the idea that you
can add raw material to the top and scoop out crumbly compost
a short time later in a continuous process. It NEVER works like
this, just ignore that it's there at all.
The small door at the front is useless, it gives the idea that you
can add raw material to the top and scoop out crumbly compost
a short time later in a continuous process. It NEVER works like
this, just ignore that it's there at all.
![]() I add an insulating "floating lid" inside
any compost bin that sits on top of the compost itself inside
the actual lid, I use something fairly heavy so it weighs the
compost down as it rots.
I add an insulating "floating lid" inside
any compost bin that sits on top of the compost itself inside
the actual lid, I use something fairly heavy so it weighs the
compost down as it rots.
![]() Ground anchor screws, these might be of some
use when the bin is virtually empty, but they add another job
when moving the bin, I haven't used them for years and it
makes no difference at all.
Ground anchor screws, these might be of some
use when the bin is virtually empty, but they add another job
when moving the bin, I haven't used them for years and it
makes no difference at all.
![]() Position - If possible and if there is a choice place
it in a position where it gets at least some sun during the
day to heat it up, also choose a black rather than the green
one for greater warmth. This will speed up the rotting down
of contained material.
Position - If possible and if there is a choice place
it in a position where it gets at least some sun during the
day to heat it up, also choose a black rather than the green
one for greater warmth. This will speed up the rotting down
of contained material.
![]() Place the bin on slabs if possible, it makes it
easier to empty, the soil is fine too if you can't do this.
Place the bin on slabs if possible, it makes it
easier to empty, the soil is fine too if you can't do this.
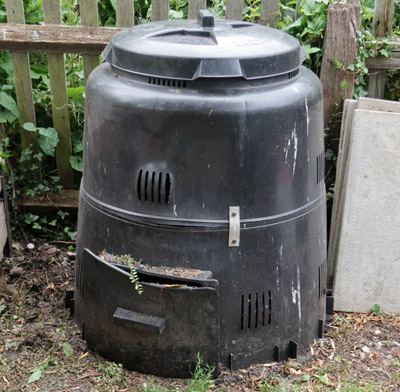
This bin is about 25 years
old and still going strong, the repair with metal strips
to hold the top and bottom together was made over ten
years ago, there are three strips around the circumference.
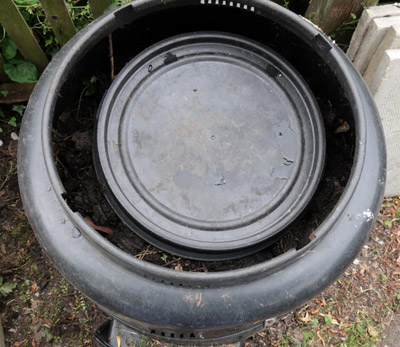
The "floating lid"
inside my bin, this is a heavy rubber lid that went
on top of a large plastic drum. If you don't have
anything like this to use, a circle of thick plywood
will do the job with some further insulation such as
a double layer of old carpet (synthetic so it doesn't
rot) or similar nailed onto the underside.
How to use the bin
![]() Don't worry about it not getting hot. If you are
adding anything plant based to the bin in dribs and drabs as
most of us do it will still rot down well. It will only get
hot if the heap is very large, several cubic metres, or if a
lot of material is added in one go, at least 1/3rd of the heap
AND if it is the right balance with lots of green matter, preferably
shredded.
Don't worry about it not getting hot. If you are
adding anything plant based to the bin in dribs and drabs as
most of us do it will still rot down well. It will only get
hot if the heap is very large, several cubic metres, or if a
lot of material is added in one go, at least 1/3rd of the heap
AND if it is the right balance with lots of green matter, preferably
shredded.
![]() Cut the things you add to the heaps into small pieces,
this is the best thing you can do to speed up the composting
process, it will still happen if you don't, but more slowly.
Cut the things you add to the heaps into small pieces,
this is the best thing you can do to speed up the composting
process, it will still happen if you don't, but more slowly.
![]() Have a compost bucket by the back door. Put all organic
waste into this, fruit and vegetable peelings, dead cut flowers
etc. and empty it onto the compost heap when its full.
Have a compost bucket by the back door. Put all organic
waste into this, fruit and vegetable peelings, dead cut flowers
etc. and empty it onto the compost heap when its full.
![]() Grass cuttings can be a blessing and a curse. In too
big an amount on their own they become slimy and rot slowly.
However, they have lots of nitrogen and are great for helping
speed up the rotting of other things. I coincide hedge cutting
with lawn cutting so I can mix both together as I add them to
the heap. If I have a lot of grass clippings and nothing else
I keep them in a large tub (with a makeshift lid) until I have
other material to add to the heap and then mix the two, you
can keep them for up to about a month like this.
Grass cuttings can be a blessing and a curse. In too
big an amount on their own they become slimy and rot slowly.
However, they have lots of nitrogen and are great for helping
speed up the rotting of other things. I coincide hedge cutting
with lawn cutting so I can mix both together as I add them to
the heap. If I have a lot of grass clippings and nothing else
I keep them in a large tub (with a makeshift lid) until I have
other material to add to the heap and then mix the two, you
can keep them for up to about a month like this.
![]() Don't let the compost dry out, the rotting process
will stop if it does, pour a full watering can over them if
this happens to get things moving again, excess water will drain
away.
Don't let the compost dry out, the rotting process
will stop if it does, pour a full watering can over them if
this happens to get things moving again, excess water will drain
away.
![]() The small door in the bin is useless. If you open it
and dig the compost out it will collapse after a couple of shovelfuls,
ignore it.
The small door in the bin is useless. If you open it
and dig the compost out it will collapse after a couple of shovelfuls,
ignore it.
![]() Mix green (high nitrogen) and brown (high carbon) materials
together so there's not too much of either in a
lump, it will speed up the rotting of both.
Mix green (high nitrogen) and brown (high carbon) materials
together so there's not too much of either in a
lump, it will speed up the rotting of both.
 Don't bother with the useless
little door at the front,
Don't bother with the useless
little door at the front,
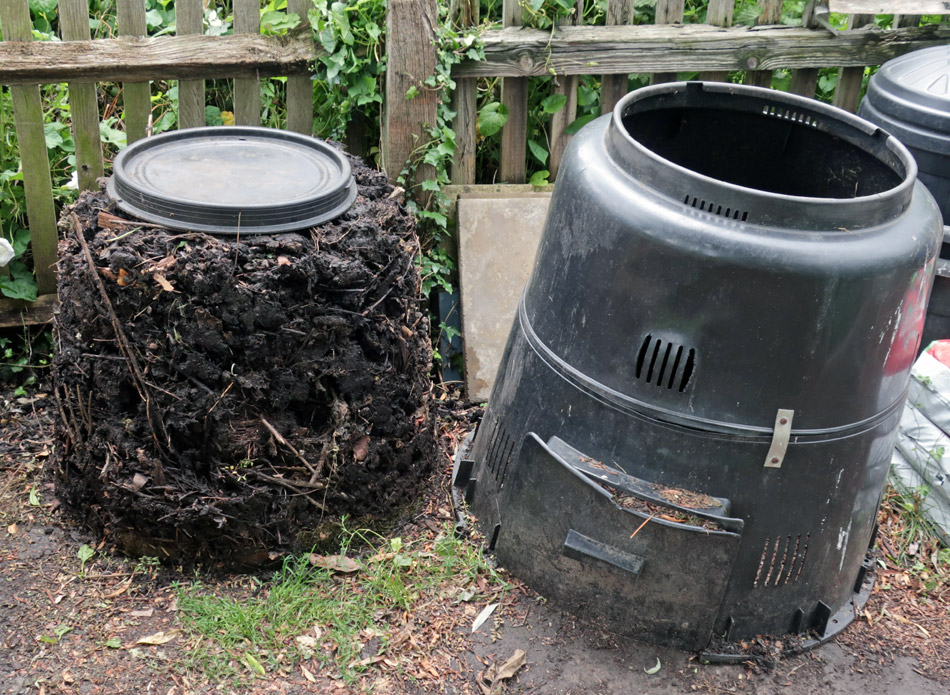
empty the compost by wiggling
the whole bin and then lifting it off.
Ending the process and using the compost
The good news is that when the bin is full it will still go down for a while allowing more space for more material, eventually however this will end. Ideally this will happen after the growing season in the autumn or early winter when there will be a few months of little to add to it.
Remove the ground anchor screws if you have used them, take the lid off, wiggle the bin loose from the contents and remove it from the pile which will stand on its own. The top of the heap will be more recently added and less rotted than the bottom.
If it is the end of the season and it needs more time, use a garden fork to put the contents of the heap back into the bin in its now slightly new position, this will turn it upside down and mix the contents up which will get it going again. Put the lid on and leave it as long as you can before you need to fill it again. You don't HAVE to do this and can just leave it but the results will be better if you do.
If you still have a lot of material to put into and there is more to come for another couple of months or more, put the unrotted top 1/3 to 1/2 into a big tub or wheelbarrow and use the rest in the garden as soil improver. Put what is in the tub/wheelbarrow back into the bin and carry on adding to it.
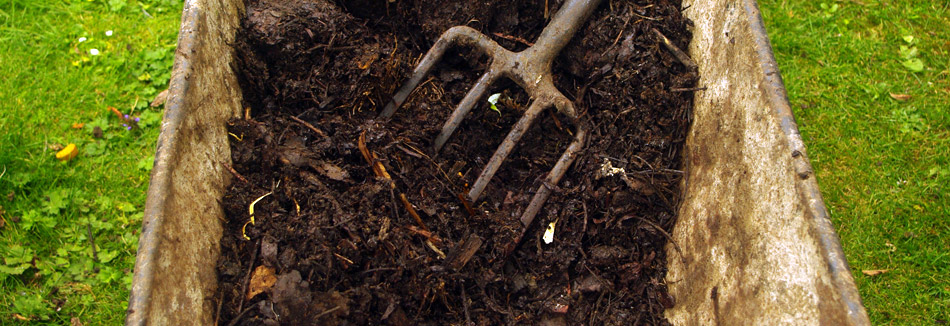 Garden
compost ready to be used, here it's about to be dug into
the planting hole for a climbing rose.
Garden
compost ready to be used, here it's about to be dug into
the planting hole for a climbing rose.
Don't expect what comes from your heap to look like the compost you buy in bags from the garden centre. To make it uniform and crumbly, you'd need to shred all of the material initially and then compost it in huge (many cubic metres) heaps that are turned regularly and then sieve it before use.
This is unnecessary to produce soil improver however. When ready to use it should be fairly uniformly dark brown and have no identifiable things other than perhaps small twigs, it can be used to dig into planting holes, to dig into a bed prior to planting vegetables or ornamentals or simply spread on the surface as a mulch. If you can time the spreading for the autumn, much will be taken down into the soil by worms saving you the effort. It will add slow release nutrients to the soil and help improve the soil structure.
There may well be some larger pieces in your compost, larger twigs, pieces of stem, root balls etc. that are too big to spread on the garden. Take these out and put them back onto the heap for another go, if they are very large and very woody, they really need chopping up more or maybe dealing with in some other way.
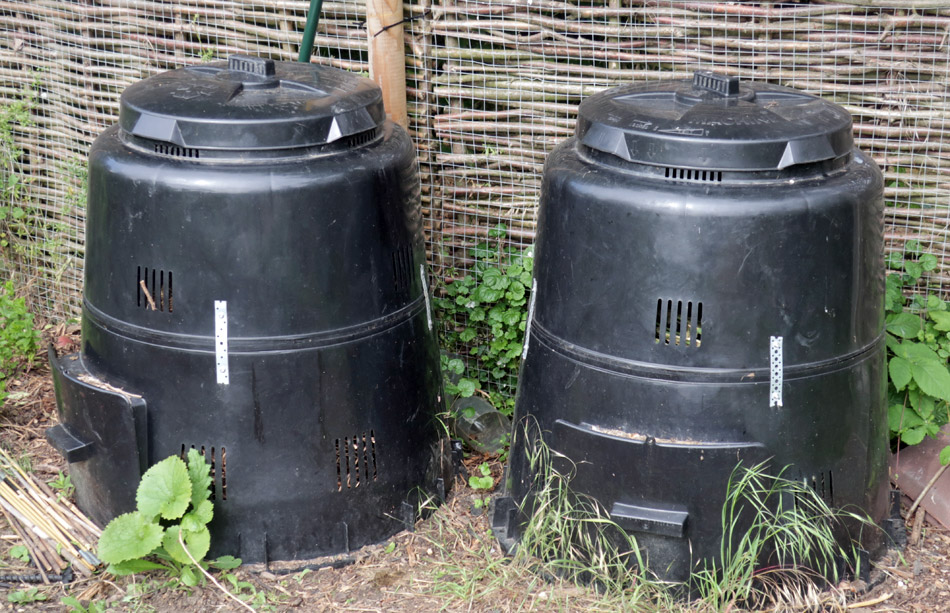 Composting
goals - two bins.
Composting
goals - two bins.
Copyright 2000 - present. All Rights Reserved | Privacy Policy Statement